I find I love a more naturalist form than a heavily designed produced form in many things. If you come to the house you can easily see I am not a minimalist at all. I love all my bits and pieces and I do tend to fill a room with “stuff” that has meaning for me. My stuff may be a little more simple than some, that’s all I mean.
I love to make wood wreaths. Usually, I go to the craft store and buy various sizes of grapevine wreaths and then decorate them. However, I now have a newly found material for my wreaths- tree branches.
My very talented daughter-in-law by partner [ how complicated relationships have become- smile] made me this wreath out of branches from the alder tree in the back garden in Ireland.
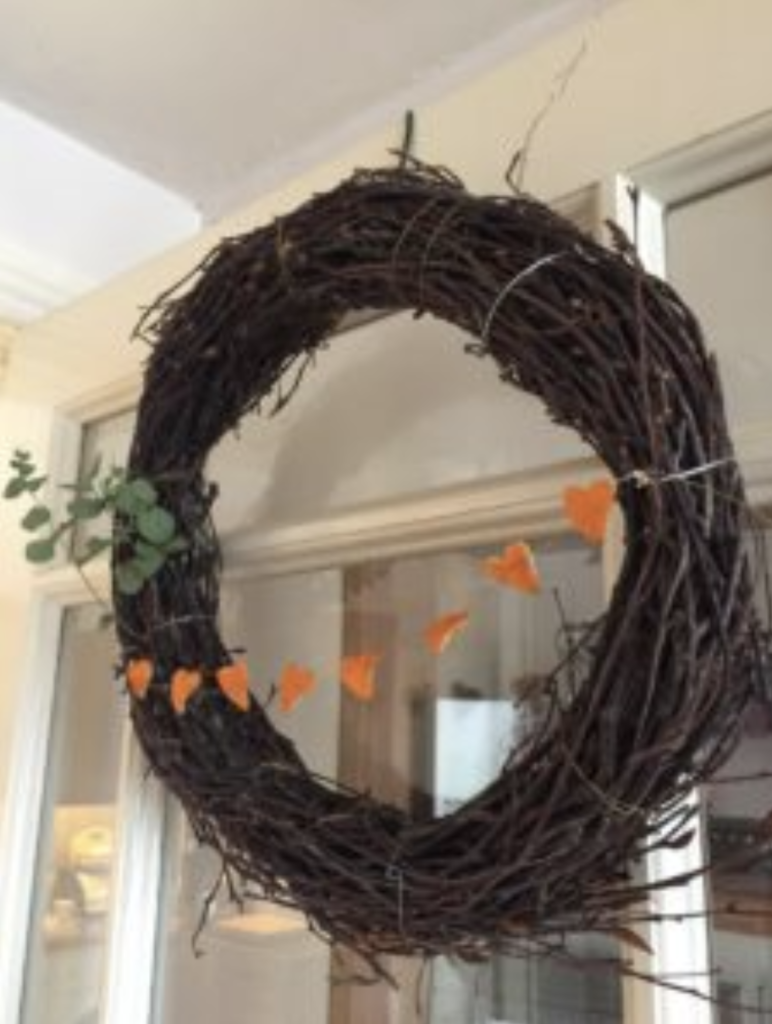
The shape of this wreath is more similar to the grapevine but does not follow true to the twig wreaths I have seen. Those tend to be more spiral with branches open instead of this enclosed form Allison used.
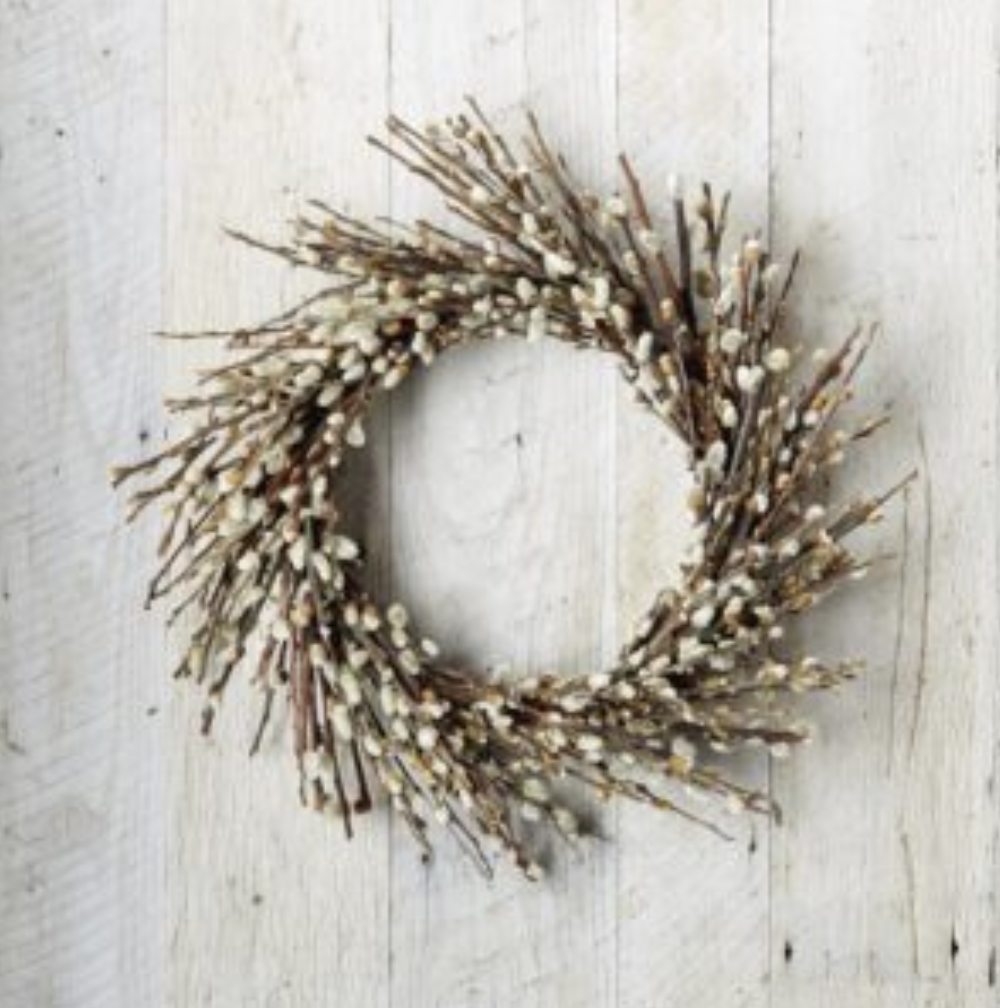
These spiral twig wreaths are beautiful and cane be made out of branches like seen above or out of flowers and herbs but they still look more open and spiral in shape as in the PussyWillow wreath from one of my favorite home and kitchen stores- Willliam Sonoma
In Ireland, there are many types of trees and shrubs used to make a wreath. Birch branches, yellow and red dogwood shrubs, willows, just to name a few. Any flexible tree or shrub branch will work. I find I like the more enclosed form better. Here in Ohio I will walk through the wood around the condo and see what I can find. I know you can order willow branches online and my local craft stores Pat Catan and Michaels have various artificial and natural branches I can use. But I would much rather gather my own. It’s times like this I wish I had my big house gardens. I had forsythia, lilacs, holly, birch trees, and other plantings that would make good wreaths. Oh well, Off to the woods I go!
Step by Step to Make a Natural Branch Wreath Making
The technique is really quite simple.
- Find flexible branches: willow trees, shrubs, grasses and make a pile
- Take the longest of the branches and make your shape tied together then add groups of smaller branches to fill out the wreath. If the branches are smaller than the circumference you wish that take branch bunches and start tying them together with others to form a chain of the circumference you desire.
- If the branches are long enough just bend into a round or oval shape and tie together with string or wire. I tie with string, which is removed later so color doesn’t matter
- Build up the oval until you have the desired thickness. If you have a lot of smaller branches use them in the middle part to build up to near to the thickness you want and then complete with the longer branches. Then take a relatively thin wire { black or brown} from a craft store and tile the oval together in three or four places. Then cut strings and remove.
- Now the fun part- attach decorations. I use a glue gun to attach floral items or perhaps a birds nest, little figure, etc. I also tie a garland or decorate string to the wreath. You can make it as plain or elaborate as you wish.
- Make sure to put a wire at the top so you can make a loop if you wish to hang on a hook. I hang mine on those over the door wreath hangers.
Wood ‘N’ Whimsey will be offering these round twig wreaths and grapevine wreaths for sale or for custom order starting July 1st, 2019. Feel free to contact for special orders. I can use the colors you want and can add the items you wish.
Nice talking with you…leave your comments
Talk soon
Dee